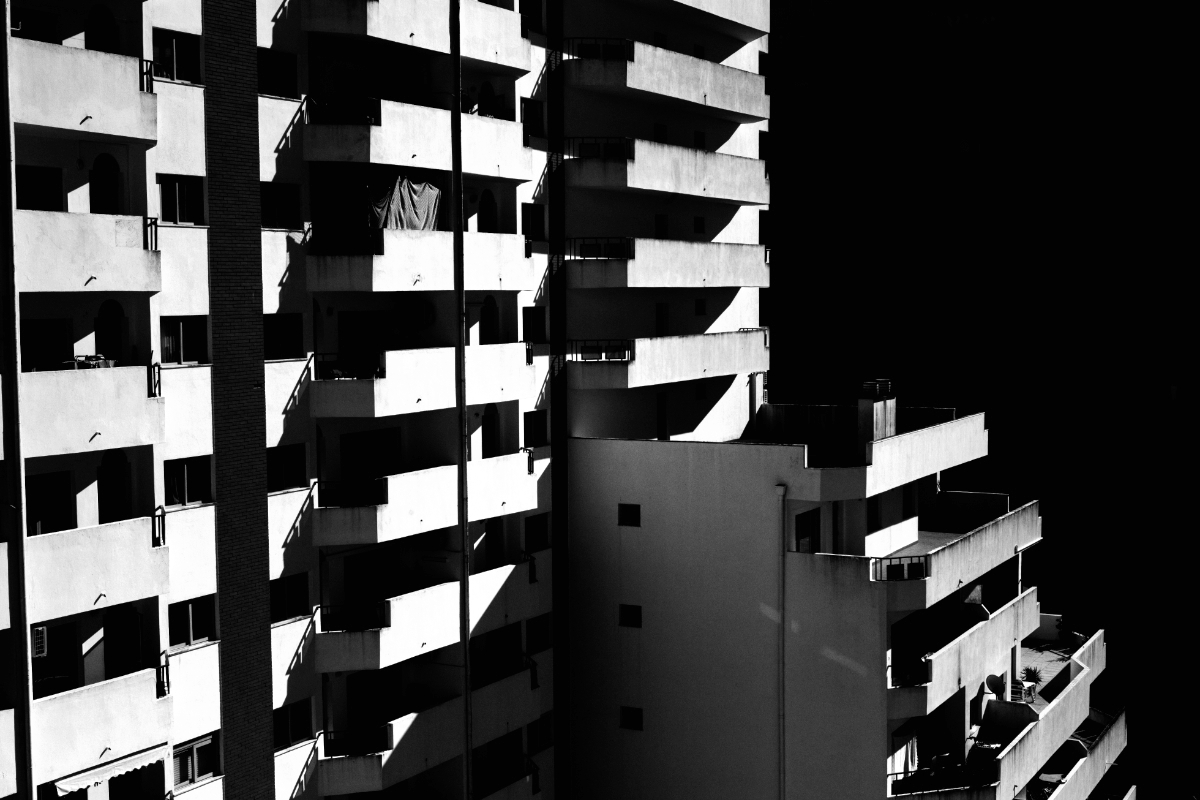
Understanding exposure through the principles of analogue push and pull processing
Exposure has always been central to photography. Whether working with traditional film or a digital sensor, the amount of light recorded determines much of the technical quality and visual character of an image. In analogue photography, push and pull processing offered photographers ways to work beyond a film’s nominal sensitivity and influence its tonal characteristics. A classic example is Kodak Tri-X 400, frequently exposed at ISO 800 or 1600 and developed accordingly to produce stronger contrast, deeper shadows and a distinctive grain structure. Digital photography offers similar creative possibilities, but the underlying processes are fundamentally different. Understanding these differences is essential when deciding whether to overexpose, underexpose or simply adjust the tonal characteristics during RAW development.
Understanding Digital Exposure
In digital photography, exposure is determined by the amount of light reaching the sensor. Aperture controls how much light passes through the lens, while shutter speed determines how long the sensor receives it. ISO affects how the camera processes the captured signal and influences the brightness and noise characteristics of the resulting image. Increasing ISO does not make the sensor collect more light. Overexposure occurs when too much light is recorded for the intended result. Important highlights may become completely white, losing detail that cannot be recovered. Underexposure occurs when insufficient light is captured. Dark areas may contain limited usable information, and brightening them during post-processing can reveal additional noise. Neither is automatically a mistake. Photographers may deliberately sacrifice shadow or highlight detail to achieve a particular visual effect. The important distinction is between intentional tonal interpretation and unwanted information loss.
Why RAW Exposure Matters
RAW files preserve considerably more flexibility for adjusting exposure and tonal relationships than JPEG files. A JPEG has already undergone in-camera processing, including contrast adjustments, sharpening and tonal compression. Recovering information from extreme highlights or shadows is therefore more limited. RAW photography allows greater control over the final appearance, but it cannot overcome every limitation of the original exposure. The most useful general principle is to capture sufficient light while protecting important highlights. Unnecessarily underexposing a RAW image is rarely beneficial. Although shadows can often be brightened, doing so may increase visible noise and reduce tonal separation. Conversely, a slightly brighter exposure can improve image quality, provided important highlights remain within the sensor’s recording range. This leads to a technique known as Expose to the Right.
Expose to the Right (ETTR)
Expose to the Right, or ETTR, is a method of maximizing useful light capture in RAW photography. The technique involves increasing actual exposure until important highlights approach, but do not exceed, the sensor’s recording limits. The name refers to the histogram, where brighter tonal values appear toward the right.
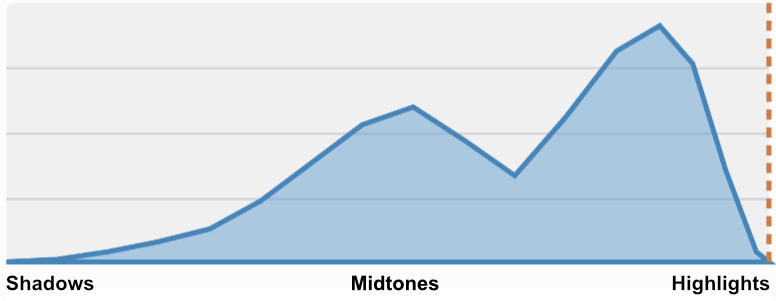
Collecting more light generally improves the signal-to-noise ratio, particularly in shadow areas. During RAW development, the photograph can subsequently be darkened to achieve the intended appearance. ETTR does not mean deliberately overexposing every photograph. It is a method of optimizing recorded information. It is also important to distinguish increasing actual exposure from simply increasing ISO. A longer shutter speed or wider aperture can increase the amount of light collected. Raising ISO alone cannot. ETTR is not always practical. Subject movement, depth-of-field requirements and changing light may take priority over maximizing exposure. The objective is not the brightest possible photograph, but a RAW file containing the most useful information for the intended result.
Histograms and Clipping
A histogram displays the distribution of tonal values within an image.
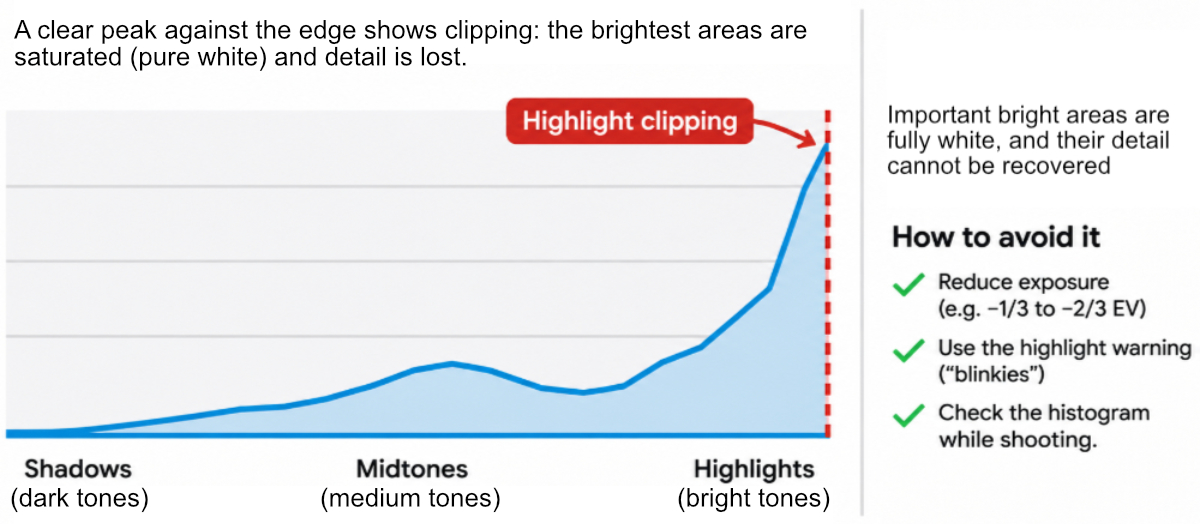
The left side represents shadows, the centre represents midtones, and the right side represents highlights.When tonal information reaches the extreme edges, clipping may occur.
Highlight clipping happens when bright areas exceed the available recording or output range. If the sensor has become saturated, the missing information cannot be fully restored.
Shadow clipping occurs when dark areas lose visible tonal separation. Some apparently black regions may still contain recoverable RAW information, although recovery is limited by noise and the original exposure.
A histogram touching either edge does not necessarily indicate a problem. Some scenes naturally contain pure blacks or whites. RGB histograms provide additional information by displaying the red, green and blue channels separately. This is useful because individual colour channels can clip even when the overall brightness distribution appears acceptable. Many cameras also provide highlight warnings. However, these are frequently based on the JPEG preview rather than the actual RAW data. The histogram should therefore be treated as an exposure guide, not an absolute measurement of recoverable information.
Exposure Compensation and EV
Exposure compensation allows photographers to adjust the exposure selected by the camera’s metering system. The adjustment is expressed in exposure values, commonly abbreviated as EV.A difference of one EV corresponds to one photographic stop. When achieved through aperture or shutter speed, one positive stop doubles the amount of light reaching the sensor, while one negative stop halves it.
| Compensation | Relative light exposure |
|---|---|
| +2 EV | Four times |
| +1 EV | Twice |
| +1/3 EV | Approximately 1.26 times |
| 0 EV | Metered exposure |
| −1/3 EV | Approximately 0.79 times |
| −1 EV | Half |
| −2 EV | One-quarter |
These light ratios do not apply when the camera changes only ISO. Zero EV is a useful starting point, but it does not guarantee correct exposure. A bright scene containing snow or white buildings may require positive compensation, while a predominantly dark scene may require negative compensation. For RAW photography, compensation should be guided by the subject, histogram and desired tonal interpretation rather than fixed rules.
Push Processing in Analogue Photography
Push processing is one of the defining techniques of traditional black-and-white photography. It involves exposing film at a higher exposure index than its nominal ISO rating, followed by modified chemical development.
Kodak Tri-X 400 provides a familiar example.
| Exposure index | Processing | Exposure change |
|---|---|---|
| ISO 400 | Normal | None |
| ISO 800 | Push +1 | One stop less |
| ISO 1600 | Push +2 | Two stops less |
When Tri-X 400 is exposed at ISO 1600, it receives two stops less light than it would at ISO 400 under equivalent conditions.
Extended development increases negative density and contrast, particularly in more strongly exposed areas. It cannot fully restore shadow detail lost through reduced exposure. The resulting photographs often exhibit stronger contrast, reduced shadow separation and more prominent grain. These characteristics have become closely associated with classic black-and-white documentary and street photography. However, the precise appearance depends on the film, developer, development time, agitation and subsequent printing or scanning. Push processing is therefore not simply a way to increase film speed. It also changes how tonal values are represented.
Pull Processing: The Opposite Approach
Pull processing combines increased film exposure with reduced chemical development. For example, Tri-X 400 exposed at ISO 200 receives one additional stop of light, while exposure at ISO 100 represents two additional stops. Development is then reduced to control negative density and contrast. Pull processing can produce softer contrast, improved shadow exposure and more manageable highlight densities, depending on the film and development method. It is particularly useful when a photographer wants to control negative contrast in strongly illuminated scenes. Where pushing generally produces a more forceful tonal interpretation, pulling can provide a gentler progression between shadows, midtones and highlights. Neither method is inherently superior. Both reflect deliberate decisions about exposure and development.
Can Digital Photography Reproduce Push and Pull Processing?
Digital photography cannot reproduce the chemical processes of photographic film. A digital sensor converts light into electrical signals, while photographic film records a latent image through light-sensitive silver-halide crystals. Increasing digital ISO does not produce the same effect as pushing film. Similarly, underexposing a RAW file by two stops and brightening it afterwards is not equivalent to pushing Tri-X 400 from ISO 400 to ISO 1600. The digital procedure may simply introduce more visible noise. A more effective approach is to separate image capture from creative development. First, record a technically sound RAW image. Then establish the desired contrast, shadow density, highlight rendering and grain during post-processing. This provides considerably greater control over the final result. The same principle applies to pull-inspired photographs. Softer contrast and extended tonal separation can be created through careful development without deliberately overexposing the sensor.
Creating the Pushed Tri-X Look Digitally
The characteristic appearance of pushed Tri-X is more complex than simply increasing contrast. Its visual strength comes from the relationship between deep blacks, expressive midtones, bright highlights and grain. A convincing digital interpretation should concentrate on these relationships. For a look resembling Tri-X 400 pushed to ISO 800, begin with moderate tonal compression. Establish a strong black point, introduce a controlled S-shaped tone curve and preserve sufficient separation in the midtones. For a more aggressive ISO 1600 interpretation, deepen selected shadows, strengthen midtone contrast and allow certain highlights to approach pure white. Grain can then be introduced to complement the tonal structure. The aim is not to preserve every detail. Some shadow information may be intentionally sacrificed to create a more graphic image. However, indiscriminate shadow clipping often produces harsh results without the tonal sophistication associated with traditional film. A strong black-and-white photograph depends on selective contrast, not maximum contrast.
Lightroom Classic and Affinity Photo 2
Both Adobe Lightroom Classic and Affinity Photo 2 provide tools for creating high-contrast black-and-white photographs from RAW files. Their approaches differ mainly in workflow.
Lightroom Classic offers an integrated RAW development environment with dedicated controls for exposure, highlights, shadows, whites, blacks and tone curves. Its Black & White Mix allows photographers to control how individual colours translate into grey tones. The Grain effect provides adjustments for amount, size and roughness.
Affinity Photo 2 provides RAW development through its Develop Persona, followed by more extensive editing through adjustment layers. Black & White, Curves, Levels and Shadows/Highlights adjustments allow precise control over tonal relationships. Grain-like texture can be introduced using appropriate noise effects or additional texture layers.
Lightroom is particularly convenient for developing large collections of photographs with consistent settings. Affinity Photo offers extensive layer-based control for photographers who prefer to work on individual images. Neither application automatically produces a more authentic film appearance. The final result depends primarily on the photographer’s interpretation of tone, contrast and texture.
A Practical Digital Workflow
For photographers seeking the expressive character of pushed black-and-white film, a straightforward workflow is usually sufficient.
- Photograph in RAW. Preserve maximum flexibility for subsequent tonal adjustments.
- Expose deliberately. Collect sufficient light while avoiding irreversible clipping of important highlights.
- Choose ISO according to the conditions. Do not increase ISO merely to imitate film grain.
- Convert to black and white. Adjust the contribution of individual colours to the final grey scale.
- Establish the black and white points. Decide which tonal extremes should retain detail.
- Shape the midtones. Use a controlled S-curve to strengthen contrast where it matters.
- Introduce grain selectively. Match its strength and structure to the image.
- Evaluate the finished photograph. Judge contrast and texture at the intended display or print size.
These steps provide a flexible foundation rather than a fixed recipe. Different photographs require different tonal decisions, even when the intended visual style remains consistent.
Exposure and Interpretation
Analogue push and pull processing demonstrate that exposure and development have always been closely connected to photographic expression. Digital photography preserves that creative relationship while changing the technical process. Underexposure does not automatically create the character of pushed film, just as overexposure does not reproduce pull development. The most reliable approach is to capture sufficient useful information in RAW and establish the intended tonal character during development. For photographers drawn to the dramatic appearance of pushed Kodak Tri-X, the essential qualities remain familiar: deep blacks, powerful midtones, controlled highlights and expressive grain. The tools may have changed, but the underlying photographic decisions have not. Exposure determines what information is recorded. Development determines how that information becomes a photograph.